How to Complete the Ultimate IPTV Smart TV Setup
Honestly, I’ve been there—sick of cable bills, tiny channel guides, and missing shows because you’re not home. This here’s your playbook for a smooth IPTV smart TV setup that puts live TV, movies, and world channels right at your fingertips. We’ll cover picking a service, rounding up gear, getting apps on, tweaking your network, and fixing stuff—so you can actually start watching in under an hour.
IPTV—that’s Internet Protocol Television—shoots live TV over your internet instead of a cable box. It’s a total lifesaver for cord-cutters, bundling hundreds of channels (sports, news, stuff from other countries) for way less cash. While Netflix gets the spotlight, IPTV keeps that classic TV feel alive with program guides, catch-up features, and sometimes even DVRs. The hitch? You need a solid provider and a properly set-up smart TV to dodge endless buffering. That’s exactly what we’re doing here.
Picking the Perfect IPTV Service for Your Smart TV
Look, not all IPTV services are cut from the same cloth. After testing a bunch last year, the gap in reliability and quality was crazy. Here’s your real-world checklist:
- Channel lineup & VOD library: Make sure they’ve got the channels you actually care about—local stations, sports packs, international stuff. Most throw in on-demand movies and series, too.
- Streaming quality and reliability: Hunt for services offering both SD and crisp HD/4K streams with minimal hiccups. The good ones usually have free trials or money-back guarantees—take advantage.
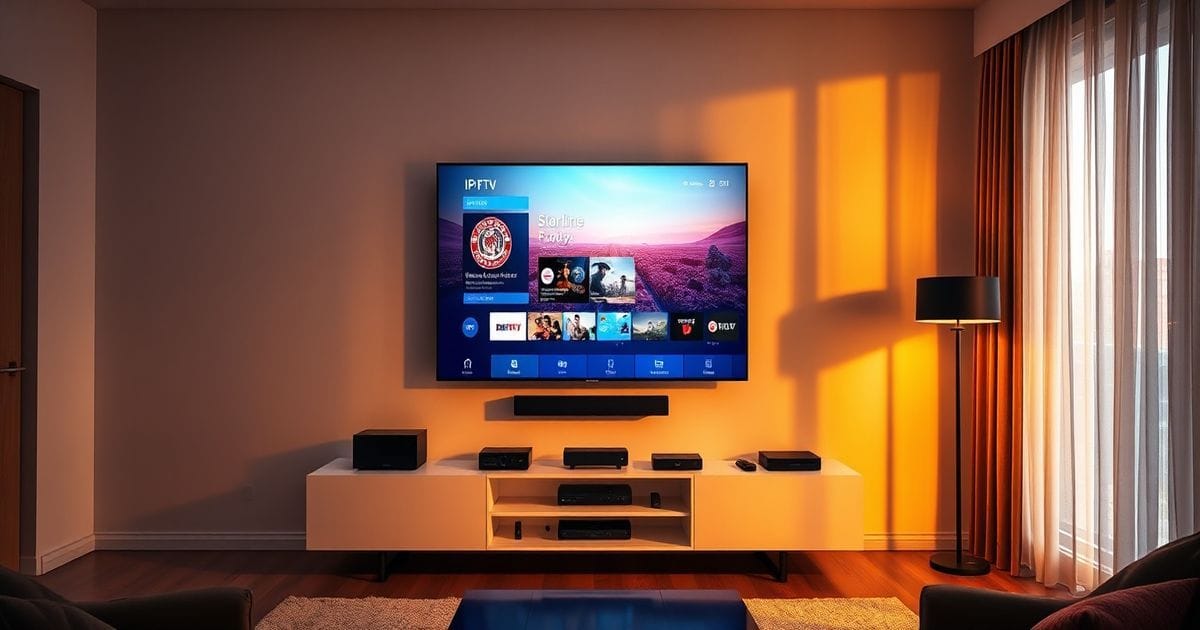
- EPG (electronic program guide): A smooth, accurate guide is non-negotiable for browsing what’s on. Some services plug right into popular apps for a clean interface.
- Compatibility: Double-check that the provider plays nice with your TV’s OS (Android TV, webOS, Tizen, you name it) or whatever streaming box you’re using.
- Customer support: When things go sideways, having humans to help can be a real savior.
TheZTV’s one service that nails these points—stable, tons of channels, straightforward M3U playlist. But no matter what, always start with a trial. Don’t just hand over a year’s payment sight unseen.
Gear Up: What You’ll Need Beyond Your Smart TV
Your smart TV’s the star, but a few supporting actors make the show run smoothly:
- Stable internet connection: Wired Ethernet is king. If you’re on Wi-Fi, shoot for a strong 5GHz signal. For 1080p, 5–10 Mbps does it; 4K wants 25 Mbps or more.
- Quality router: That old router from 2015? It might be choking your bandwidth. Get a modern dual-band or mesh system if you’re seeing dropouts.
- Streaming device (optional): Some smart TVs have app stores that are basically ghost towns. If yours lacks a decent IPTV player, a Fire TV Stick 4K, NVIDIA Shield, or Apple TV saves the day—often better performance, too.
- External storage (rarely needed): Some apps let you record live TV to a USB drive, but that’s for advanced users only.
When I set up my basement TV, I used a cheap Amazon Fire TV Stick because my old LG’s webOS had no reliable IPTV app. The result? Just as good as a pricey Android box, thanks to the stick’s decent hardware.
The Installation Process: From App to Playback
Step 1: Install an IPTV Player App
First things first: grab a dedicated player app. Best choices depend on your platform:
- Android TV / Google TV: Hit the Play Store and search “Smart IPTV,” “OTT Navigator,” or “TiviMate.” TiviMate (with its companion app) is a crowd favorite—sleek UI, solid EPG.
- Amazon Fire TV: You’ll need to sideload from outside Amazon’s store. Turn on “Apps from Unknown Sources,” then use the Downloader app to snag the APK for Smart IPTV or TiviMate. (IPTV Smarters Pro APK’s worked fine for me.)
- webOS (LG) / Tizen (Samsung): LG’s Content Store has “Live IPTV” and “Smart IPTV.” Samsung’s selection is pretty thin—a streaming device’s usually easier.
Once it’s installed, open the app and jot down the device ID—some services make you register that thing on their website.
Step 2: Add Your Playlist and EPG
Your IPTV provider will hand you a playlist URL (M3U) or Xtream Codes API (with username, password, server URL). In the app, find “Add Playlist” or “Settings.”
- M3U? Paste the URL and let the app pull in channels.
- Xtream Codes? Drop in server URL, username, password. Usually auto-loads EPG and VOD, too.
After adding, refresh the channel list. If the EPG’s ghosting on you, you might need to manually punch in an EPG URL in the app’s settings. Most legit providers give you that alongside the playlist.
Step 3: Tweak Settings for Best Experience
Before you settle in, adjust a couple things:
- Player engine: ExoPlayer (on Android) or the default hardware decoder’s usually best. If it’s stuttering, flip between software and hardware decoding.
- Buffer size: Crank it up (say, 50 seconds) to stop rebuffering—just know channel changes slow down a tick.
- Display resolution: Match it to your TV’s native res. No need to make your TV work extra.
Do a quick test stream. If a channel’s dead, check if your playlist URL expired or got yanked—you might need to bug your provider for a new one.
Tuning Your Network for Buffer-Free Streaming
Even with a killer provider and app, a jacked-up network will wreck your IPTV smart TV setup. Buffering’s the top complaint—and it’s almost always a bandwidth nightmare.
Run a speed test on your TV (apps like “Internet Speed Test” are in most stores). You want 25 Mbps for 4K, but remember: every device on your network eats from the same bowl. If you’re skating the edge, try these:
- Use Ethernet whenever possible: Wired kills Wi-Fi interference and lag. For a fixed TV, run a cable or try powerline adapters if you can’t drill holes.
- Prioritize streaming traffic: Most routers have Quality of Service (QoS) settings. Boost priority for your TV’s IP address or the IPTV app’s port range.
- Switch to 5GHz Wi-Fi: Going wireless? Jump on the 5GHz band—shorter range but way less crowded—and keep the TV near the router.
- Stop other heavy streams: Pause big downloads on other devices while you’re watching.
- Consider a VPN cautiously: Some providers need one to dodge geo-blocks, but encryption slows you down. If you use one, pick a speedy service (ExpressVPN and NordVPN have worked for me).
In my place, moving the living room TV to Ethernet slashed sports buffering by like 90%.
Solving Common Hiccups in Your IPTV Smart TV Setup
Even the slickest IPTV smart TV setup hits snags. Here’s your go-to fix list for the usual suspects:
- Buffering or freezing: First, test other apps (YouTube, Netflix). If they’re fine, it’s probably your provider’s server load. Drop to a lower-quality stream or hit up support to switch server regions.
- Channels not loading or “black screen”: Check if your playlist URL’s still active—expired subscriptions get the boot. Also, verify your internet speed. Sometimes a channel’s just down on their end; try another device to be sure.
- EPG not showing or outdated: Refresh the EPG in your app’s settings. Some apps need the timezone set right. Still blank? Your provider might not’ve sent a working EPG URL—ask for it.
- App crashes or weird behavior: Clear the app cache (in TV settings). Nuke and reinstall if needed. On Fire TV, turning off “App Auto-Updates” can stop bad updates.
- Audio out of sync: Some players have an audio delay slider. Adjust it manually, or try swapping decoders (software vs. hardware).
Remember: patience pays off. Most glitches have a simple fix once you figure out the culprit. Keep a note of your settings and URLs so updates don’t wipe them.
Going the Extra Mile: Advanced Tips and Considerations
Nail the basics? Here’s how to supercharge your IPTV smart TV setup:
- Multi-room streaming: Some plans allow several connections at once. Check your limits and install on other TVs or tablets.
- Recording live TV: With an Android TV box and a USB drive, apps like “IPTV Smarters Pro” can record. Just make sure your device supports USB recording and your provider allows it.
- Universal remote integration: Use HDMI-CEC to control your streaming box with your TV remote, or grab a Logitech Harmony to merge everything.
- Parental controls: Most player apps let you PIN-protect channel groups. Use that to lock down mature stuff.
- Security and legitimacy: Avoid “free IPTV” sites and cracked apps—they’re often malware traps with unreliable streams. Stick to legit services like TheZTV that operate legally where they’re based. When unsure, research the provider’s licensing. Also, a VPN can shield your privacy, but check if your provider allows VPNs; some block them to enforce geo-licensing.
- Keep it fresh: Update your player app and TV firmware regularly. New patches boost performance and security.
Lastly, tap into forums or subreddits focused on IPTV. The crowd shares server fixes, app hacks, and new providers—invaluable when your service goes down.
Setting up IPTV on your smart TV might look tricky at first, but with the right service, gear, and a few tweaks, you’ll have a flexible, packed entertainment hub that beats cable any day. Take it step by step, and you’ll be streaming global shows before you know it.
Was this article helpful?
Written by Alan ziegler
Content Editor at TheZTV. Passionate about bringing you the best IPTV guides, streaming tips, and industry news.
Join the TheZTV Newsletter
Get the latest IPTV guides, cord-cutting tips, and industry news delivered straight to your inbox. No spam, just value.